Overlay Studio is where you decide what Unitra's subtitles look like: the font, the colours, the outline, the background band and how new lines appear. One look is used everywhere at once: the subtitle overlay on your desktop, the browser overlay in OBS, and the Xbox Game Bar widget for fullscreen games.
Overlay Studio is included with Champion (Legend and Creator accounts have it too). You need Unitra AI Desktop 0.15 or newer.
The screenshots and the video are from Unitra AI Desktop 0.15 on Windows.
Prefer to watch? Here is the same setup on video:
1. Open Overlay Studio
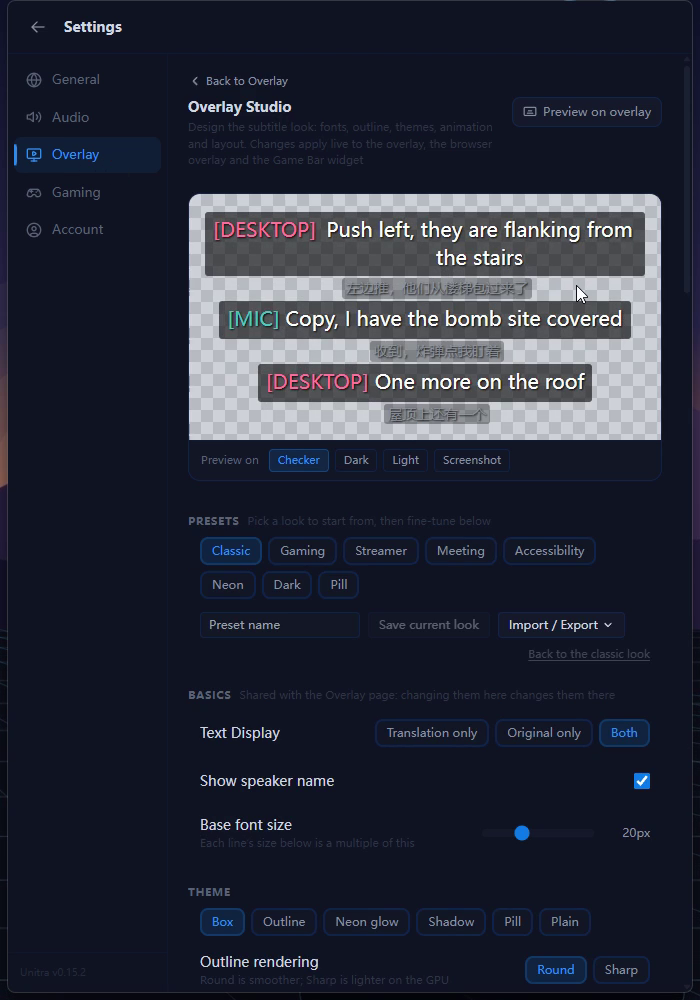
Open Settings > Overlay and click Open Overlay Studio. The card above the button shows the look you are using now. Overlay Studio opens as its own page inside Settings; Back to Overlay at the top takes you back.
2. Start from a preset
The preview pinned to the top of the page shows your subtitles exactly as they will look, and it stays in view while you scroll. Under Preview on you can put it on Checker, Dark or Light, or pick Screenshot and load an image of your own game to judge contrast against the real thing.
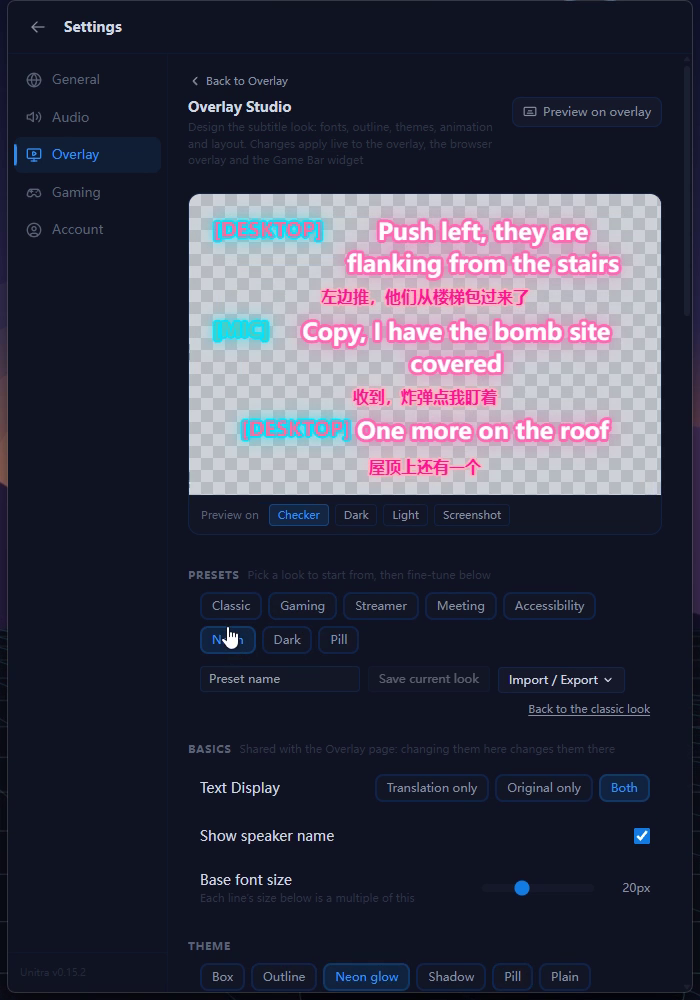
Under Presets, pick a look to start from. There are eight: Classic, Gaming, Streamer, Meeting, Accessibility, Neon, Dark and Pill. If you ever want to start over, Back to the classic look is in the Import / Export menu.
The Basics section holds Text Display, Show speaker name and Base font size. These are shared with the Overlay page, so changing them here changes them there too.
3. Pick a theme and style each line
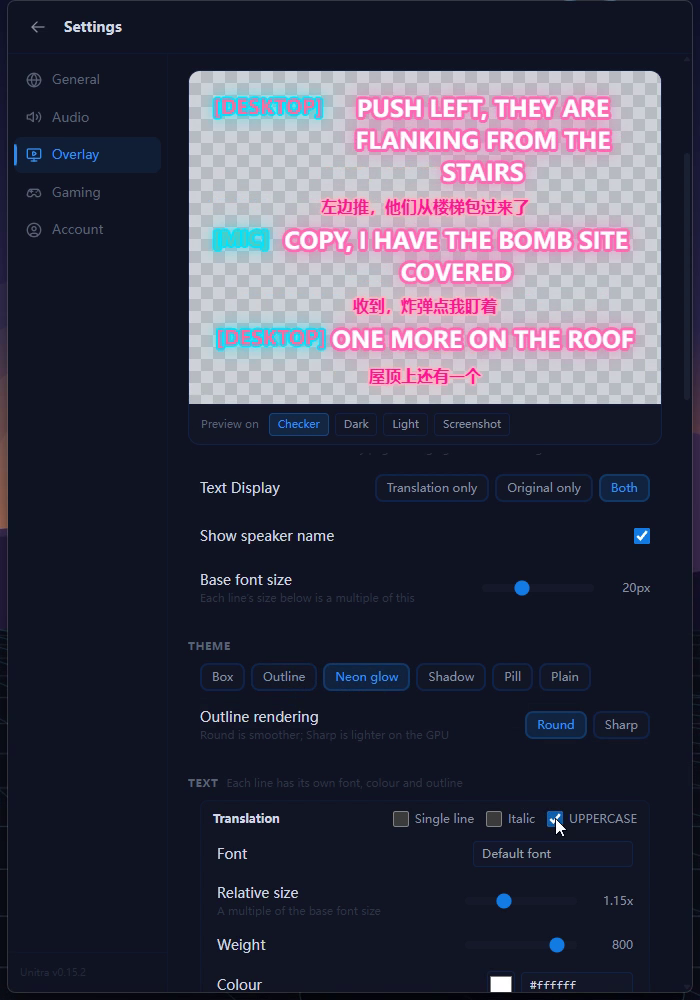
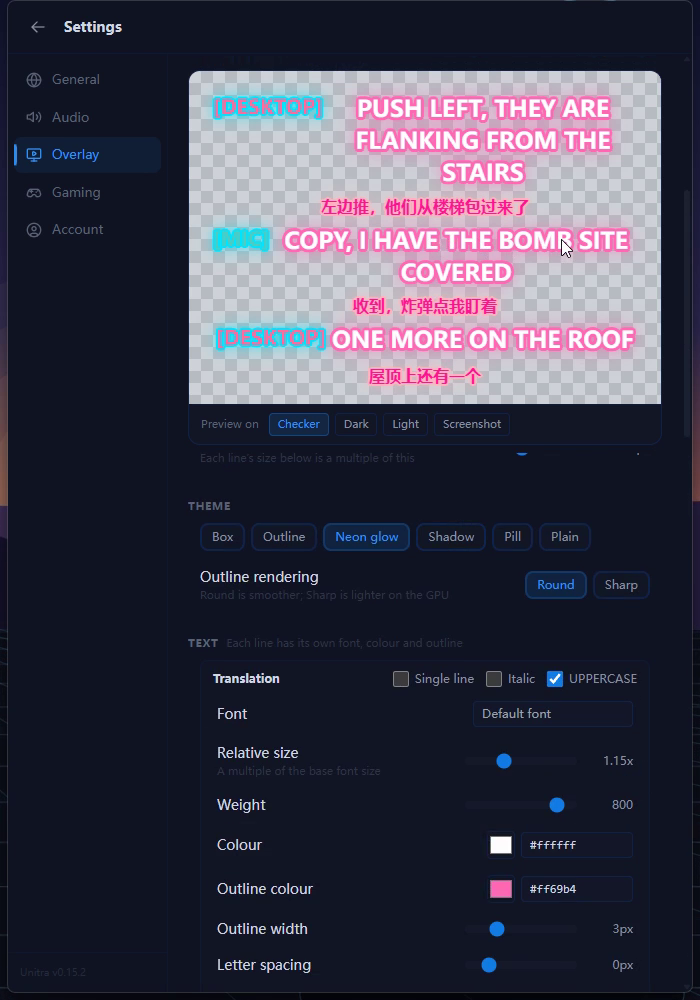
Under Theme, choose how the text sits on screen: Box, Outline, Neon glow, Shadow, Pill or Plain. Themes with a band behind the text let you set the Band colour, Background Opacity, Corner radius, padding, a Border and Glass blur, which blurs whatever is behind the band. Band chooses between one band Per line or One panel behind everything.
Under Text, each line has its own settings: Translation, Original (transcription) and Speaker tag. For each one you can set the Font (any font installed on your PC), Relative size (a multiple of the base font size), Weight, Colour, Outline colour, Outline width, Letter spacing, Line height and Max lines, and switch on Single line, Italic or UPPERCASE.
4. Colour your voice and the game differently, and choose an animation
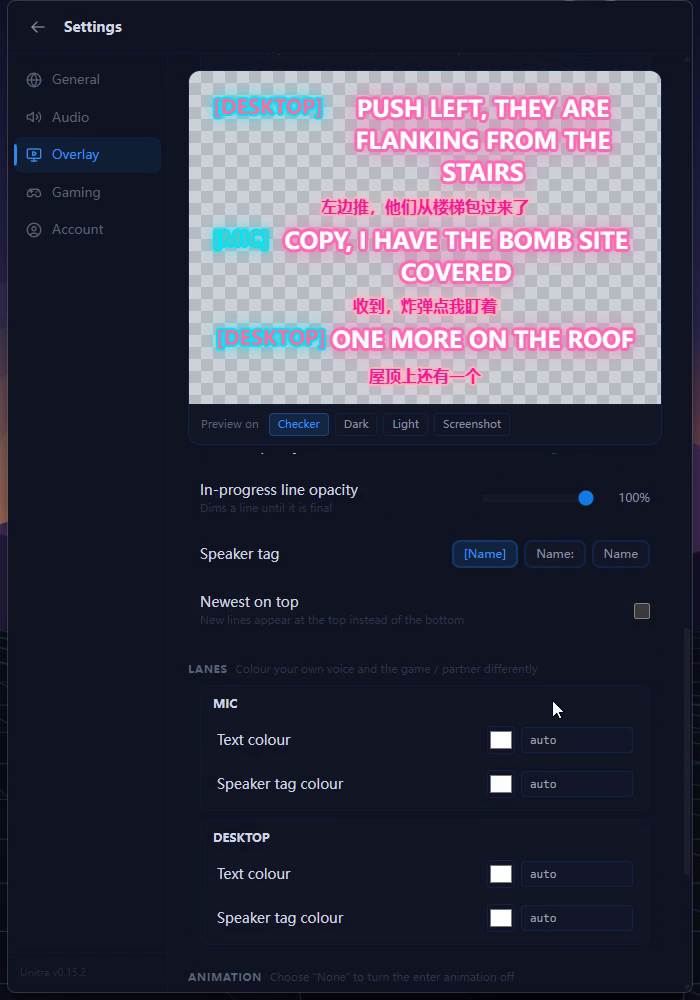
Lanes gives your own voice (your mic) and the game or your partner (desktop audio) their own Text colour and Speaker tag colour, so you can tell at a glance who said what.
Animation sets how new lines appear. Entrance can be None, Fade, Rise or Pop, and Duration sets how long it takes.
Layout covers the rest of the arrangement: Alignment, Gap between messages, the In-progress markers shown around text that is still being recognised and their opacity, the Speaker tag style, and Newest on top if you want new lines at the top instead of the bottom.
5. Check it at full size with Preview on overlay
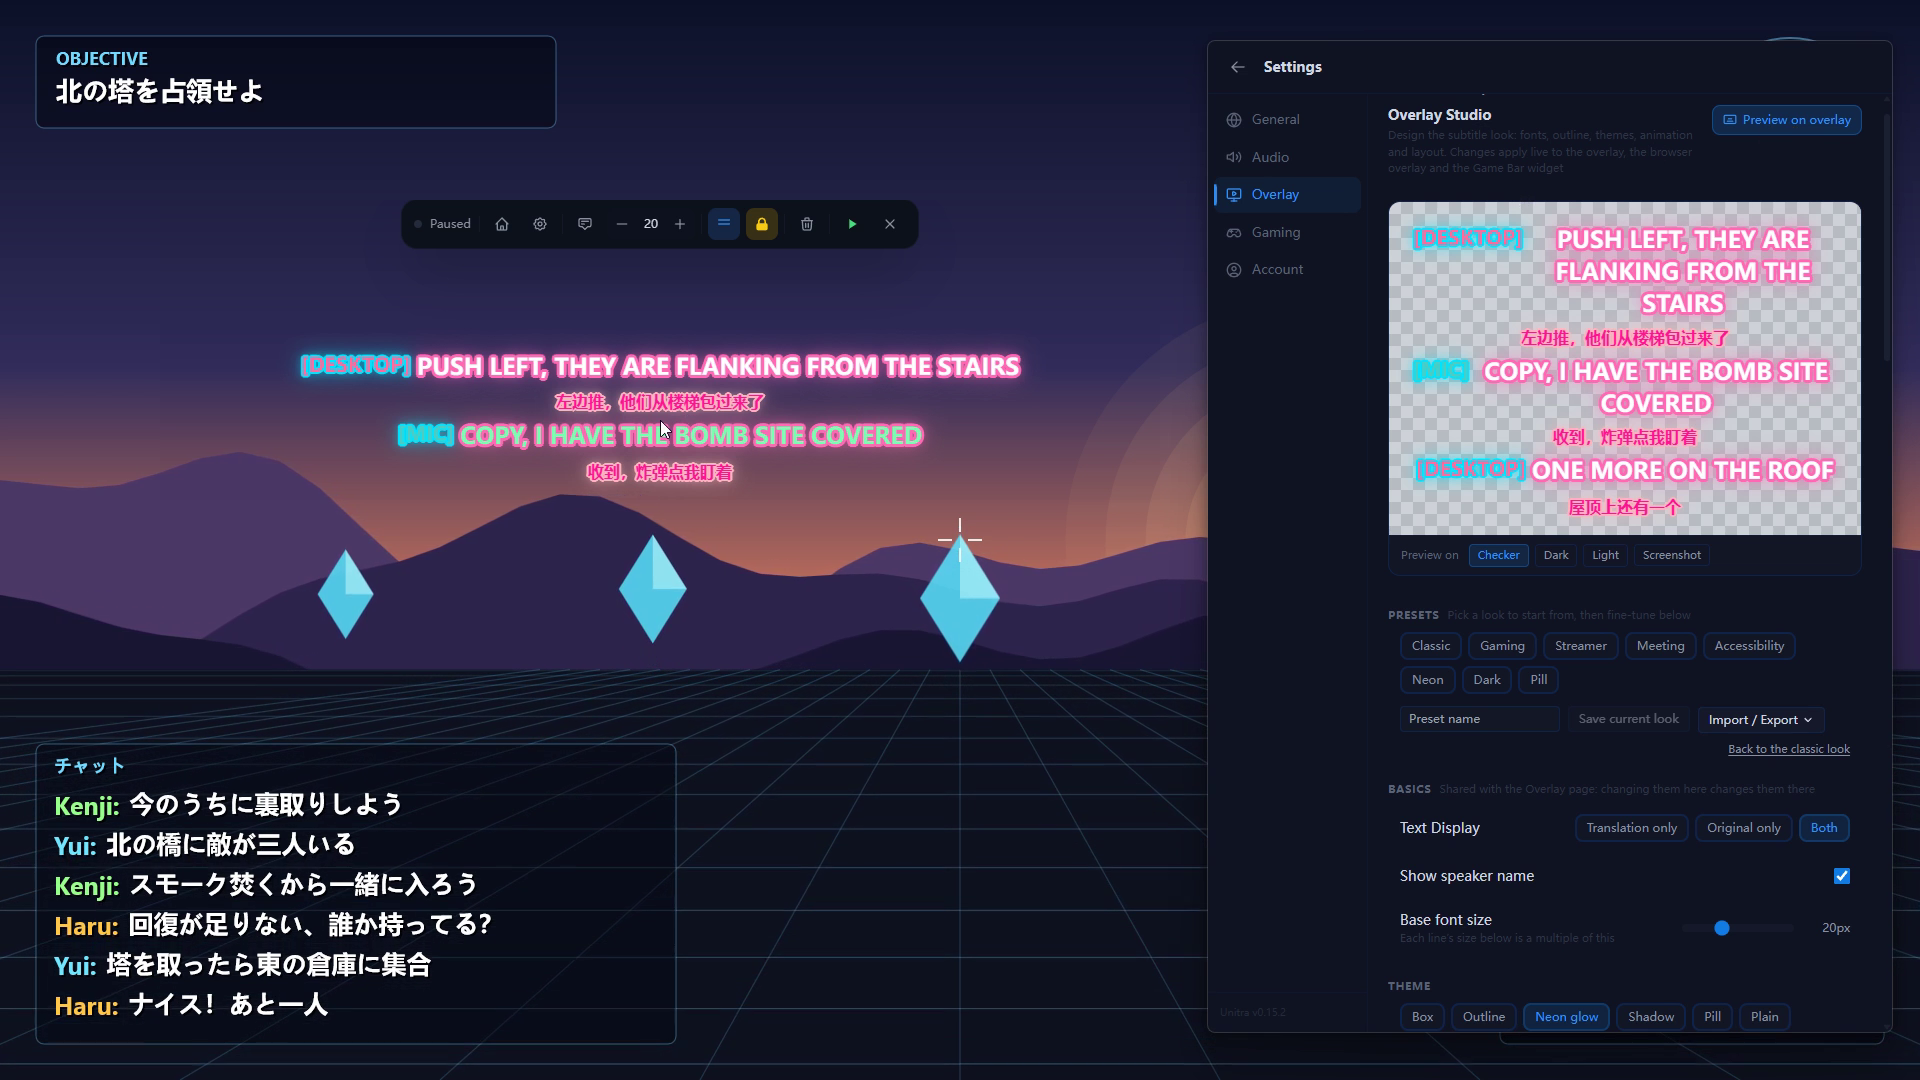
Turn on Preview on overlay to show sample lines on your real desktop overlay, at full size, on top of your game. They only appear while Overlay Studio is open, and never in OBS or the Game Bar widget, so you can leave it on while you are live.
Where the subtitles sit on screen is still up to you: drag the overlay window on your desktop, or move the source in OBS.
6. Save your look as a preset
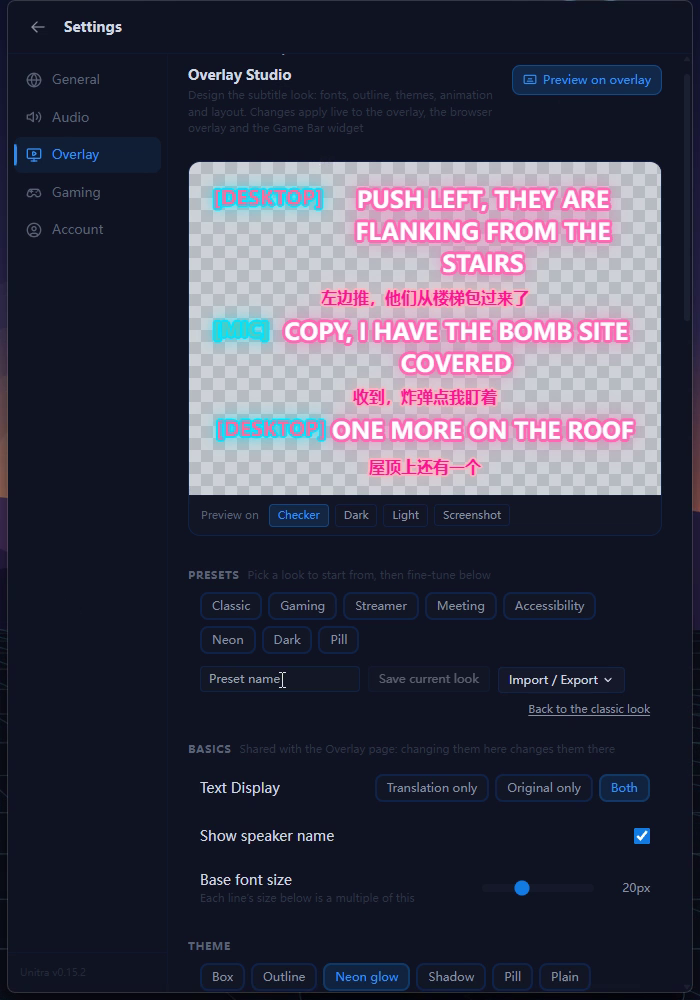
There is no Save button: every change applies right away, to the desktop overlay, the OBS browser overlay and the Game Bar widget, even while you are streaming. To keep a look you like, type a name into Preset name and click Save current look. It then sits next to the built-in presets.
7. Share a look with Import / Export
Open Import / Export to share looks. Copy as JSON copies the current look as text you can paste into a chat. Paste JSON… applies a look someone sent you. Export all to file saves every look into one file, and Import file loads one back, for example on another PC.
8. The same look in OBS and in Game Bar
Your look follows your account: with Champion, the current look and your saved presets sync to every PC you sign in on. If you change it on two PCs, the most recent change wins, and Unitra tells you when it has applied a version from another device.
The OBS browser overlay and the Game Bar widget use the same look automatically. If you set up OBS with our stream overlay guide, there is nothing more to do. If you need the window capture method instead, the Background section can fill the overlay with Chroma green for a chroma key filter. The OBS browser overlay is already transparent, so leave it on Transparent there.
For anything the controls do not cover, Advanced takes up to 4 KB of your own CSS. It applies only inside the overlay, and web resources such as images and fonts are not loaded.
If something looks off
- My changes do not show on the real overlay. On the free plan you can open Overlay Studio and try presets on the preview, and Copy as JSON, export and import still work, but changes do not reach your real overlay. That needs Champion.
- The font looks different in OBS. A font has to be installed on the PC that runs OBS. If it is missing there, OBS falls back to a default font.
- My look changed by itself. You probably changed it on another PC; the most recent change wins. Save looks you want to keep with Save current look so you can go back to them.
- The sample lines are still on my desktop. They disappear when you leave Overlay Studio or turn off Preview on overlay.
More Unitra tutorials
- Getting started with Unitra: from first launch to live translation
- Unitra screen translation: translate game chat and on-screen text
- Unitra Voice Output: let your teammates hear you in their language
- Unitra in fullscreen games: subtitles with the Xbox Game Bar widget
- Put live translated subtitles on your stream
If something does not work as expected, let us know in Discord.